Showing posts with label christmas. Show all posts

Thursday, September 11, 2014

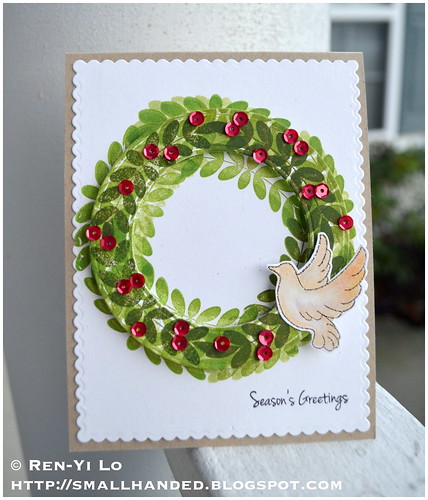
[Uniko Studio] September Revisited Blog Hop - Peace On Earth

Hello everyone! It has been forever since I have made a card. And it took me ever so long to come up with one. We won't ask how long, since it would be too embarrassing. With all this wedding-schmedding-palooza, I haven't really had a chance to get creative and I feel like the creative muse has left me high and dry - probably frustrated that when I did get hit with an idea, I never sat down to do it, or worst, not even write it down. Instead I just steamrollered on with my mass production craziness and kept telling her to leave me alone...Well serves me right. So just be gentle when looking at this card...:)

This month we are re-visiting a set, just in time to start thinking of the holiday (oh dear, another mass production in sight!) Peace on Earth. I love how this gem of a set is only $8 and has some great elements to make an arsenal of cards.


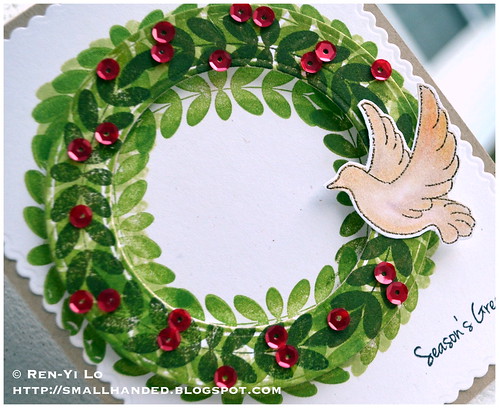
I decided to see if i could convince the branch to be a wreath. So I gathered up all the green inks that I have in my tiny ink collection and went to work.

Season's Greetings

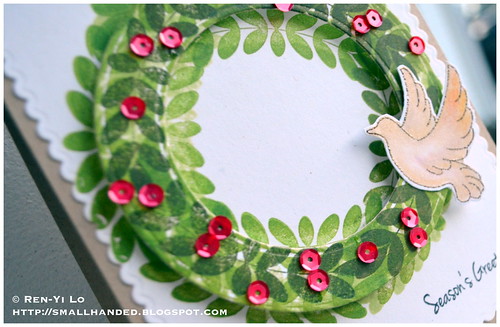
I stamped a complete circle first, and then tried to find the right sizes in my Spellbinder Small Circle die to cut out a "wreath." Since I wanted this more for dimension, I knew I had to fill in the white space with a bit more green stamping. This is where all the shades of green came into. With a bit of offset here and there, some stamping off and then stamping, I was able to stamp onto the cut out circle as well as the base card stock.

Season's Greetings

I have a ton of sequins in my stash, so I thought it would be appropriate to pop them onto the wreath. The dove is embossed in gold, shaded with color pencil and Gamsol, and then popped onto the wreath. Any of the sentiments work quite well here, and I was debating about stamping it in the center or on the bottom edge of the card. Here the card again slightly angled so that you can see the dimension that the wreath gives this card.

Season's Greetings

Hope you feel inspired with some samples. Bev is going to draw a winner for this lovely stamp set or a gift card of equivalent value. You have until 11:59p BST September 25 to leave comments along the blogs. In the meantime, I'm sending you off to fabulous, amazing Taheerah. Here the whole list for easy navigation ...
I hope you like what you're seeing. Again, be gentle. I feel like a newbie, but hope to get back into the swing of things!

Stamps: (Peace on Earth) Uniko Studio
Paper: (Rustic White, Kraft, Basic White) Papertrey Ink
Ink: (Jenni Bowlin - No. 6 Stick Candy) Ranger; (Versamark; Mememto - Tuxedo Black) Tsukineko; (Shadow Ink - Forever Green) Hero Arts; (Creative Color - Mojito) Mama Elephant
Embellishments: (Creative Cuts - Femme Frames) Mama Elephant; (Embossing Powder - Gold) Ranger; (Sequins - Raspberry Red Satin) Neat & Tangled

Thursday, December 5, 2013

[Little Tangles] Challenge #26 - Color Challenge: White & Gold

Hi everyone! I can't believe it is already December. I have nothing checked off my to-do list for the holidays. How are you faring?


While I go run around like a mad woman, we have a color challenge for you this week Gold & White? Isn't it one of the loveliest color combinations for the holidays? Gold is so very in right now...

Merry & Bright
Stamps: (Merry & Bright, Santa's Tag) Neat & Tangled
Paper: (Perfect Match Card Stock - White) Papetrey Ink

Ink: (Brilliance - Galaxy Gold) Tsukineko
Embellishments: (Candi - Gold Wedding) Craftworkcards; (Ribbon Scrap) Michael's; (Sequins - Snow White) Neat & Tangled


This is just a super quick tag. With this time of year, I have to make super quick things. So This is my version of a white & gold tag, grabbing whatever was laying around on my desk. I think this tag is so stunning because of the ribbon scrap I used. It was a piece of leftover after we made out advents wreath this weekend, and I couldn't bear seeing any part of this ribbon trashed.

Merry & Bright

Since these sequins were laying around, I thought I'd pop a few white ones on along with those Candis. This took less than ten minutes! Whoop.

That's all I have for you. Go see the other girls' creations. They will surely have many inspirations for you...

Here is the reader's digest version.
  • Challenge ends Dec 15, 2013, 11:59p EST; Check back for the winners
  • Prize is ONE Neat & Tangled Stamp set of your choice to a random player
  • Neat & Tangled stamps are not required on your entry, but we would love to see you use them. If you would like to use some Neat & Tangled products but haven't had a chance to buy any, we have a couple of freebies on the Little Tangles site. Enjoy!
Can't wait to see your creations! :)

    Monday, November 18, 2013

    [Uniko Studio] Challenge No. 5 - Christmas or Winter Holiday


    Hi everyone - we're back with another challenge this month. It's perfectly themed for the upcoming holidays: Winter or Christmas theme.

    by Pinterest

    This beautiful picture inspired me to pull out my little christmas tree from the latest Uniko Studio release. And I love the lights, which inspired me to pull our my new stamps to play with and go with a golden, warm color.

    Tis the Season to be Jolly...
    Stamps: (Jolly Christmas) Uniko Studio
    Paper: (Paper Basics Card Stock - Ocean Tides, Vintage Cream) Papertrey Ink; (Summer Stories) Teresa Collins; (Corrugated Card Stock - Green) stash
    Ink: (Creative Color Pigment Ink - Orangeade, Sunshine, Winter) Mama Elephant; (Memento - Tuxedo Black) Tsukineko
    Embellishments: (Signo Gelpen - White) Uniball; (Creative Cuts - Embellished Tags) Mama Elephant


    I apologize about my pictures… the colors are a little bit of wonky because I was taking it under some yellow light bulbs. Didn't manage to catch the sunlight.

    I stamped the little tree on the back of the corrugated card stock and cut it out, popped it on a tag with some stars and decided to stamp on the fun lyrics from a popular Christmas song.

    Tis the Season to be Jolly...

    The papers are from Teresa Collins Summer Stories. Yep a summer collection, but the gold was perfect for the extra bit of Christmas shimmer. Don't forget to check your collections, since there are always generic patterns in the mix, and they might just be the right color mix.

    Anyways, that's all I have for you. Check out the rest of the girl's cards and leave them a sweet comment or two. Remember you don't have to use all the colors - any or all as an inspiration.

    Lastly, a few helpful things to remember:
    • Challenge ends Dec 14th, 2013, 11:59p BST; Check back for the winners after
    • Prize is £10 Gift Certificate to the random Winner & a Guest Design spot on our following challenge
    • Three people will win a spotlight
    • We would like you to use a Uniko Studio product; If you don't have any, check out the freebies here
    I hope to see you play along, so that I can pop in on your lovely blogs! See you soon!

    Monday, November 11, 2013

    [Uniko Studio] November Blog Hop - Label Love: Christmas Revisited

    Hello everyone! October's release just slipped right past me. Between my crazy travel schedule, the manufacturers, international shipping and the postman, it was one of those unfortunately "not going to happen" moments. But I hope to get to play for a bit and I will be posting a few projects revisiting the recent release.

    Today, however, I am going way back into the recent past, and am showing off an oldie-but-goodie set. A big drum roll for Label Love: Christmas.


    It is inevitable to start thinking of Christmas, right?

    Season's Greetings
    Stamps: (Label Love: Christmas) Uniko Studio
    Paper: (Paper Basics Card Stock - Smokey Shadow, Vintage Cream) Papertrey Ink; (Summer Stories) Teresa Collins
    Ink: (Memento - London Fog) Tsukineko
    Embellishments: (Summer Stories - Sticker Accessory Sheet) Teresa Collins


    This is just a simple cute card with some good old fashion paper layers. And I thought this would be a fun take on non-traditional Christmas / Winter holiday colors. You know what this card really needs? Wink of Stella...Yeah, I have totally fallen in love with this medium, and totally need one. It's so going on the wish list ;)

    Season's Greetings

    Hope you feel inspired to get your crafting up and going again.

    And if I remember correctly, Bev is going to draw a winner for each stamp set revisited or a gift card. On my blog you can win a £10 Gift Certificate. So remember to comment along the way. You have until Nov 14. In the meantime, I'm sending you off to fabulous, amazing Stacey.

    Here the whole list for easy navigation ...
    I hope you like what you're seeing. Hope to see your creations soon!

    Thursday, December 13, 2012

    [DYSU] Challenge #102 - Christmas


    Good morning! Wow - it is already December 13th! I can't believe it, less than a week and I will be on a plane. I'm not ready for this... i'm still trying to scour all the addresses together. A good deal of people I will see in person, for which I am so looking forward to! A bunch of others, I will be sending Christmas cards to that are perhaps late... but it will get done! (or so i hope...)

    Tomorrow night we're hosting our Glühwein (mulled spice wine) and Cookies evening. I'm trying to make this a tradition to ring in the Christmas cheer among close friends and family. Florian and I made a bunch of Linzer Cookies this year, and I went to a cookie swap this past weekend. What a fun event. So isn't it appropriate that we're celebrating Christmas Time here are DYSU? So bring our your best Christmas spirits...

    This week I am showcasing The Paper Shelter. What I dig the most about these images is that they come pre-colored. Great for when time is short.

    Jolly
    Stamps: (Christmas Gift) The Paper Shelter; (Say It Loud - Holiday) Waltzingmouse Stamps
    Paper: (Paper Basics Card Stock - Pure Poppy) Papertrey Ink; (Botanical Christmas & Winter Fairy Tale) Webster's Pages; (Dots & Stripes) Echo Park
    Ink: (Versamark) Tsukineko
    Embellishments: (Nestabilities - Labels Eighteen) Spellbinders; (Corrugated Cardstock) Recycled Stash; (Stamp 'n Stuff Embossing Powder - White Opaque) Stampendous!


    This card aside from the fussy cutting went really fast. I really like how the text background was just the right shade of red - Not too bright and saturated, yet not too dull. This is an upclose look of the wonderful image...

    Jolly

    Remember that we will be closing this little challenge group, but we have still a few more challenges lined up, great sponsors that have been generous up to the last bit, and we want to go out with a bang. So let's see those creations coming!

    I'd like to invite you to hop on over to see the amazing creations by the rest of the DYSU team. Please leave them a loving comment, because they do appreciate some blog love :)

    This week's sponsor:

    * Winner’s Choice of 5 Digis

    * $20 Gift Certificate

    Thursday, December 6, 2012

    [Little Tangles] Challenge #2 - Holiday

    Note: If you are looking for DYSU Challenge or Paperplay Challenge - please keep scrolling :)


    Hi there! Third post of today. Are you sick of me yet? ;) Well our first challenge went off without a hitch, and we had a bunch of enthusiastic new players! I'm so glad to see we have a few friends for our Little Tangles challenge blog. 

    This week's theme is to make a Holiday card. As you know there are a ton of fun stamps in the store to make Holiday cards! They are also fabulous stocking stuffers, like this little "Do Not Open" one...

    Do Not Open Until December 25th
    Stamps: (Little Tangles, Do Not Open) Neat & Tangled
    Paper: (Paper Basics Card Stock - Kraft) Papertrey Ink
    Ink: (Tim Holtz Distress Ink - Vintage Photo) Ranger; (Versamark) Tsukineko
    Embellishments: (Soft-core Color Pencils) Prismacolor; (Stamp 'n Stuff Embossing Powder - Opaque White) Stampendous!


    I can't get enough of the Little Tangles set. You'll see me whipping this out for any old season...As we were putting up all these fun colors of Christmas lights, they reminded me of these fun tangles. So I reworked them into a fun bunch of curtain of various lengths. Here an up close picture of the fun little stamp that reads "Do No Open until December 25th." I think I need a personally commissioned one for the 24th, because our tradition is to open our gifts on the night of Christmas Eve. Heh...

    Do Not Open Until December 25th

    Easy, peasy card, that gave me lots to color... :) Hope you like it. And we hope that you will play along.

    So what are you waiting? :) A free stamp set is at stake...


    In the meantime, go hop on over to my other teammates creation. It will get anyone's mojo flowing for the Christmas holidays... ;)

    A few helpful things to remember:
    • Challenge ends Dec 16, 2012, 11:59p EST
    • Prize is ONE Neat & Tangled Stamp set of your choice to a random player
    • Neat & Tangled stamps are not required on your entry, but we would love to see you use them. If you would like to use some Neat & Tangled products but haven't had a chance to buy any, we have a couple of freebies on the Little Tangles site. Enjoy!


      [Paperplay Challenges] Week No. 49 - Christmas is Coming

      Note: If you are looking for DYSU Challenge - please keep scrolling :)

      Hi there! At Paperplay, the theme says it all Christmas Is Coming. Oh yes, it is! With Week 49, it's all just too real. I haven't started my christmas mailing, not everyone on my list for presents have been accounted for, and we're dashing off extremely early for Germany and the UK this year. 

      Thank goodness I don't have a picture of my face panicking. Let's instead share some things we did get done. We have bought our christmas tree, and put it up. And here is a picture of our first wreath that we made ourselves. I'm not sure if you guys have this tradition, but in Germany we celebrate advents. And every Sunday starting with the first on in December, we light a new candle. Since we haven't hit the second Sunday yet, the first one keeps going...

      Second Advent, I'm ready for you! #redemptionfromnakedwreath #firstwreath

      See that awesome ribbon? All those bow-tying for cards has finally paid off...All accessories on the wreath we found at Michael's. I only had a color scheme in mind. Everything just kind of fell into the basket...Don't you love those kinds of shopping trips?

      Anyways, for this challenge I decided to use my Neat & Tangled Stamps. I really love this Naughty, Nice, Undecided checklist...

      Nice
      Stamps: (Santa's Notes) Neat & Tangled Stamps
      Paper: (Paper Basics Card Stock - Vintage Cream) Papertrey Ink; (Snow Day Collection) Crate Paper
      Ink: (Jenni Bowlin - No. 11 Brown Sugar, No. 3 Chili Powder) Ranger
      Embellishments: (Nestabilities Labels Eighteen) Spellbinders; (Point 88) Stabilo


      No coloring...just lots of stamping and cutting of paper. The tree is actually from a pattern paper. I actually cut up good 6x6 pattern paper to get to this tree. Still have to shake off that guilty feeling for cutting into it. Does anyone else suffer from this? i know...#notreallycraftingproblems ;)

      The best of this stamp set, is this cute little "stamp of approval" stamp. Signed with the intials "NP" for North Pole...no, it doesn't stand for Non-polynomial, such as NP-complete, NP-incomplete. Move on, you nerd! ;)

      Nice

      That's all I have for you...Now head over to see how the rest of the PPC girls girls are welcoming in the season...They will absolutely knock your stockings off...! Hope you will be playing along with us this week...!

      Our sponsor this week:

      Monday, November 26, 2012

      [The Ribbon Reel] Challenge #42 - Pastel Christmas


      Hello everyone! I'm rounding out my guest designer spot with The Ribbon Reel with my second and last post for this November. It really has been fun creating projects for this group. Keilly and I had a little bit of a mail schedule mishap, so I wasn't able to showcase all of her trims in full glory last time. But this time you get to see some of the beautiful, lovely trim that I received. 

      This week we're prepping for Christmas + The Colors (Baby Blue, Pink & Cream) + some Bling. 

      I decided to ink up some of my older Brilliance ink pads for this one, and pull up some shimmery blue card stock.

      Merry Christmas
      Stamps: (Nutcracker Sweet) Waltzingmouse Stamps
      Paper: (Paper Basics Card Stock - Blue Shimmer; Perfect Match Card Stock - Vintage Cream) Papertrey Ink
      Ink: (15mm Sheer Ruffle Edge - Pink, Small Pom Pom Trim - Ivory) The Ribbon Reel;
      (Brilliance - Pearlescent Orchid; Memento - London Fog) Tsukineko
      Embellishments: (Nestabilities - Picot Edge Circles) Spellbinders; (Stickles - Baby Blue) Ranger; (Pastel White Gel Pen) American Crafts


      I inked up this fun little Christmas tree with some Brilliance pink ink (which in reality isn't as saturated magenta as on this picture). It has a nice shimmer sheen that matches the blue shimmer card stock. The bling to the tree is a bit of baby blue glitter accents. The trim is a combination of two trims from The Ribbon Reel, that layers the Small Pom Pom onto the Sheer Ruffle Edge ribbon.

      Merry Christmas

      The background is stamped in Versamark with some flourishes. I love the soft but elegant look that the background leaves. The trim is the perfect shade of aqua that I found in my stash. A bit of twine & button topped with a pearl and a beautiful pearl swirl, and the whole card is kinda done. Just a quick, elegant sentiment to tie the whole card together...

      Merry Christmas

      Make sure to stop by the rest of The Ribbon Reel's team...These girls have a lot of talent! And thank you again, Keilly, for letting me part of this fun experience!

      Saturday, November 24, 2012

      [Uniko Studio] November 2012 Release Day

      Good morning, everyone! What an exciting day for all of us at the Uniko Studio family. If you have been following along Bev's blog, then you've been seeing the many sneak peeks. Are you excited? I am...

      For the Digital Product Line up, here are the following goodies being released today...Hold on to your hats, because it's a long list.

      Stamps (in .png, .abr files)
      • Holly Jolly Christmas (3 sentiments, 6 different digis, each with different patterns; total: 14 .png files)
      • Sparkling Snowflakes (6 different digis)

      Digital Papers & Digital Elements (in .jpg file; all in 12x12, A4, and US Letter format)
      • 'Tis The Season
      • Classic Christmas
      • Classic Winter
      • Eclectic Mix Christmas
      • Eclectic Mix Winter
      • Text Style Christmas
      • Test Style Winter
      Each of these papers come usually at least 8 or more designs and some with additional colors; The Christmas collections are color schemed to green & reds (but have unique twists); whereas the Winter collections are color schemed to blues, purples (with also an interesting twist: hello aqua, hello pink!) All quite very lovely...

      Cut Files (in .png, .studio, .svg files)
      • Christmas Polaroid (5 polaroids)
      • Decorative Doilies (4 doilies to go with the Stamp Set)
      • Sparkling Snowflakes (6 to go with the above digial stamp set)
      • On The Edge (6 sentiments)
      I have a few cards today to show you how I used a variety of these products. I don't have a digital cutter, so I manually cut them (yes, with an X-acto knife). So if you see any manual imperfections or some rough edges and you are a proud owner of a digital cutter, bear in mind that your results will be much nicer, cleaner (and faster!) :)

      This first card uses a cut file called "On The Edge." This product comes with six sentiments: Merry, Christmas, Celebrate, Let It Snow, Sparkle, and Winter. I printed off the .png file and manually cut out the sentiment (to give you an idea what it looks like). I combined this with a paper from the Eclectic Mix Christmas collection.


      Christmas
      Stamps: (Eclectic Mix Christmas, On The Edge) Uniko Studio
      Paper: (Paper Basics Card Stock - White) Papertrey Ink; (Basic Card Stock - White) Recollections
      Ink: N/A
      Embellishments: (3/8" Basic Narrows Ribbon - Red) Celebrate It; (Rhinestones - Strass) Recollections


      After making this previous card, I had a brilliant idea to make a set of these cards as a gift. However, I underestimated the time it took to cut each sentiment. But I hope the idea inspires those (who have a digital cutting machine) that this makes a quick & easy gift. Just a few embellishments here and there - and you have yourself a set to gift (or a bunch of quick cards made up for the approaching holidays).

      This one also uses one of the "On the Edge" sentiments combined with the Text Style Christmas digital papers. Instead of putting a little ribbon on the bottom, I decided to punch out some of the woodsey branches out of some very glitttery green paper. Keeps the whole traditional red & green Christmas color scheme in tact...

      Merry
      Stamps: (Text Style Christmas, On The Edge) Uniko Studio
      Paper: (Paper Basics Card Stock - White) Papertrey Ink; (Basic Card Stock - White) Recollections; (Pow! Soiree Kit) American Crafts
      Ink: N/A
      Embellishments: (Woodland Branch Punch) Martha Stewart


      This next card also showcase "On the Edge" (can you tell what I really liked in this release?) with a combination of Classic Christmas digital papers. I upped the bling on this one by creating the whole sentiment in glitter. Let me just say that this adventure still has me trekking bits of gold glitter through all areas of the apartment. Glitter is quite evil that way (which is why I love the POW! glitter papers), but it came out quite lovely...

      Celebrate
      Stamps: (Classic Christmas On The Edge) Uniko Studio
      Paper: (Paper Basics Card Stock - White) Papertrey Ink; (Basic Card Stock - White) Recollections
      Ink: N/A
      Embellishments: (Essential Glitters - Florentine Gold) Martha Stewarts


      In case you want to see an up-close look, here is the sentiment in it's full glittery glory (it also hides any messy cutting ;)

      Celebrate

      For my forth and final project for today, I am showcasing something different other than "On the Edge." Surprise, surprise! How about "Christmas Polaroid"? If you're thinking, "another cut file" then you're right. Polaroid pics have been on the trend watch for a while now (see here or here for some of my favorite products), and I love how they make nice windows. Polaroid frames are great for scrapping, journaling, Project Life, or carding...they add a layer without even trying. See what I mean?

      Snow
      Stamps: (Holly Jolly Christmas, Christmas Polaroid, Eclectic Mix Winter) Uniko Studio
      Paper: (Paper Basics Card Stock - Vintage Cream, Shimmer Blue; Stamper's Select Vellum) Papertrey Ink
      Ink: (Tim Holtz Distress Ink - Antique Linen) Ranger
      Embellishments: (Wood Veneer - Stars) Studio Calico


      I cut out the Polaroid picture frame and added the Eclectic Mix Winter paper behind it. To mute the colors within the frame, I also added a layer of vellum. This gives the paper showing through the sentiment a little bit of a contrast. Since we're working with stripes, I thought it'd be fun to give it a matching stripey Christmas tree from Holly Jolly Christmas. The star is a wooden embellishment from my stash.

      Snow

      I could have played with all of these products without end. I wished I got around to playing around with Sparkling Snowflakes for the release, because I have some interesting silhouette cards in mind. But alas (as the Terminator would say) "I will be back." I hope to post up a few more creations later this week...

      Now, please hop on over to the other lovely ladies to see what inspirations they have in store for you...
      I hope you like what you're seeing. If you have any questions regarding the cut files or the print files, feel free to email me. Otherwise, I can't wait to see what you create with these great products. Please remember to share on our Uniko Studio Flickr Gallery. If we see a lot of traffic, perhaps we can convince Bev to draw a random prize? Can't promise anything, but we can try ;)

      Thursday, November 22, 2012

      [Paperplay Challenge] Week 47 - Sweet Angel

      Note: If you are looking for DYSU Challenge - please keep scrolling :)

      Hi there! It's another fun challenge at Paperplay Challenges. We are getting ready for the winter holidays & Christmas season by making Sweet Angels. One thing I realized is that I actually do not own many angel stamps or digis. I managed to find this one from my digi stash and am so grateful I ran across it.

      Peace on Earth
      Stamps: (Barry Angle) The Stamp Fairy; (Say It Loud - Winter Holiday) Waltzingmouse Stamps
      Paper: (Paper Basics Card Stock - Spring Rain) Papertrey Ink; (Basic Card Stock - White) Recollection
      Ink: (Memento - Tuxedo Black; Brilliance - Pearlescent Sky Blue) Tsukineko
      Embellishments: (Premium Ribbon - Baker's Twine) American Crafts; (The Sweetest Thing - Honey "Love" Decorative Tape) My Mind's Eye; (Stamp & Stick Glitter Ultrafine Prisma) Palette; (Point 88) Stabilo; (Soft-core Color Pencils) Prismacolor


      I colored this cute little bear in the gray & blue color scheme, to make the halo, stars and cloud stand out. What do you think? This angel bear wings is also dusted with some fine iridescent glitter...

      Peace on Earth

      I decided to give this sentiment a two stamp treatment: stamped the sentiment "Peace" first in black, then with pearlescent blue pigment ink. Then I divided the image and sentiment space with a bit of twine. Lastly, since the card was a little plain, I moved the front panel to the right, and then ran a bit of washi tape along the left.

      Peace on Earth

      That's all I have for you now. Go see what the other PPC girls did on this challenge. They will absolutely knock your socks off...! Hope you will be playing along with us this week...!

      Our sponsor this week:

      Sunday, September 30, 2012

      Glitter Cards Tutorial - Part I

      2012.09.30 - Edited to answer Elisa's Questions
      "Would it work if you removed every second strip, glitter, and remove the remaining ones and glitter them?"

      In Step 3, I actually work from top left to bottom right, one strip at a time, because when I shake the excess glitter, I tap it so that the excess glitter falls from top left to bottom right (never over an area where the glitter has been applied already). Sometimes the glitter gets "stuck" onto the back of the tape, or I brush it so that it does not touch a glittered section; I think your technique could work. In theory it makes sense, but I am rather conservative and a perfectionist, so I wanted to work through it methodically. Maybe you can start with the darker glitter so that when you tap the excess off the lighter color, it doesn't run into your lighter color. If I try it, I'll report back with images.

      Hello there! I am so glad it's the weekend. It's still quite brutal at work and I have trying to catch up on some much needed sleep and rest. But I should also take the time to catch up on a few things crafty related.

      I mentioned I would post you a tutorial for some glitter cards that were showcased as part of the of Scrapbook Steals Blog Hop. We'll let's get started!

      Remember this Xmas Card?

      merry xmas
      Stamps: (Seasons of Love) Waltzingmouse Stamps
      Paper: (Paper Basics Card Stock - Pure Poppy) Papertrey Ink; (Card stock) scrap bin
      Ink: (Versamark) Tsukineko
      Embellishments: (Double Sided Ultra Sticky Clear Tape - 3.5mm) Stix2; (Perfect Pearls - Perfect Pearl) Ranger; (Iridescent Glitter - Cherry Popsicle, Sugar Cube) Martha Stewart; (Christmas Twine) The Twinery; (Alphabet Stickers) Prima; (Kris Kringle - Felt elements) SEI; (Nestabilities - Labels Eighteen) Spellbinders


      The tutorial will only focus on making the glitter panel focal point, but I will write a little summary on the bottom how to make this card.

      To make the glitter tag
      1. First die-cut a scrap piece of card stock into Label Eighteen.
      2. Adhere double-sided tape onto the label.

        Tip: Scor-tape also works well here, but I had some Stix2 lying around, which is the same.

        Tip: I start at the center and estimate which diagonal would be longest and adhere that one first. Then I work from the center out. This way I can insure that your diagonal is perfect. I have difficulties starting from the top left corner, because the angle to cover is quite small and if the diagonal is angled wrong, the error won't perpetuate onto the entire label. Does this make sense? If not, let me know in the comments and I will demonstrate in another picture...

        Merry Xmas Tutorial

        The finished label should look like this:

        Merry Xmas Tutorial
      3. Peel one strip off and apply glitter, alternating colors to each strips.

        Tip: After peeling one strip back, I apply the glitter, tap the excess off, and then brush the excess off. Then rinse & repeat with the second color. To minimize the glitter mess, I just work methodically, slowly, and always dump the excess back into its tube.

        Merry Xmas Tutorial
      To assemble card
      1. Cut card stock in portrait view to 4.25"; score at 5.5" for vertical fold card
      2. Stamp card stock with Snowflake stamps in Versamark
      3. Dust snowflakes with Perfect Pearls - Perfect Pearl color
      4. Create glitter tag (see tutorial)
      5. Wrap Christmas twine three times around Label Eighteen Tag; adhere twine in back with adhesive
      6. Add alphas to tag
      7. Add felt elements to tag
      8. Adhere tag to base card stock
      So I hope this helps! Let me know if you have any clarification questions - i will answer them on this thread or email you. Just leave me some contact information...Stay tuned and I'll post up steps for the Celebrate shaker card next!

        Friday, December 30, 2011

        [Scrap Our Stash] December Challenge - Anything Goes

        Christmas is truly a wonderful time of the year. It's also one of the craziest when it comes to getting everything done (at both work and home) I have to come clean and admit that my international mailing is not complete. So, dear international friends, if you're reading this, you might be getting it near around (after) Christmas. It will allow you to enjoy Christmas a little longer ;)

        This is also the time of year when I am most grateful for any Anything Goes challenges, like we have going at Scrap Our Stash's December Challenge. It allows us DTers to "kill a few more birds with that the many Christmas stones" we have going. It's also neat, because lots of the girls are sharing cute gift ideas which are already making me think of next year :)


        Mini Gingerbread Houses

        Most of you know that I make a home-made thing every year, be it baking or something paper crafty. This year is no different, except that I didn't inspire this project, but rather Florian. Who would have thought he'd take a crafting interest in my December madness? Evidently, he use to make these very cute "gingerbread" houses during his childhood. The catch is, they are made out of butter cookies, rather than gingerbread. Look, our own Mini Candy Cane Lane! 

        Mini Gingerbread Houses

        I really like them, because they were (1) easy to make (2) fast to make (3) fun to make (although some houses had some questionable structural integrity) (4) and they don't make you sick to the stomach trying to eat it all. Nice bite-size houses that any parent could approve.

        Mini Gingerbread Houses

        Icing
        • Lemon Juice (fresh or bottled in the plastic lemon)
        • Powdered Sugar (lots!)
        Foundation & Structure
        House Embellishments
        • Haribo Gummy Bears
        • Lambertz Dominosteine
        • Kraft Marshmallow Trees & Stars
        • M&Ms Dark Chocolate
        • M&Ms Mint Chocolate
        • Hersey Mint Chocolate
        • Holiday Red Raspberry Berries
        • Holiday Dark Chocolate Nonpareils
        • Sugar Sprinkles (Red & Green)

        There is really no science to this, except to have fun! It's really a great project to do with friends or kids.

        Some hints:
        • For the icing just start with some powdered sugar & some lemon juice and mix to the right consistency. The icing does harden over time, so with a little drop of lemon juice, the icing can be quickly thinned out.
        • Watch out, that it's not too runny, or else the little candy pieces won't stick.
        • The LU Le Petite Beurre were better foundations & walls because they do not crumble as easily as the Bahlsen did when trying to create half sheets for the walls. (But the Bahlsen taste better ;) Maybe I am biased since I had those cookies growing up.) But next time I make them, I will go with the LU Le Petite Beurre.
        • With two people, we managed to make about 30 in 2 hours. This is a fast project!
        Here is a fun pic of my friend Kat helping (with my first self-bought Christmas tree in the background)!


        Mini Gingerbread Houses

        She has a sneaky look on her face, because she's munching innocently on some house embellishments ;) Let me just add a disclaimer, that Yours Truly was not that innocent either.

        My lessons learned from this whole project: take a chaperone with you when purchasing candy (we went crazy buying all kinds of candy cause we haven't had any in a long while) and curb eating the embellishments while making the houses. It's the fastest way to a tummy ache.

        Check out the Scrap Our Stash's December Challenge. You have until the end of the month to get your inspirations in. What are you making for the holidays? Are you done?

        Thursday, December 22, 2011

        [DYSU] Challenge #51 - Stripes

        Good morning folks! Sorry for the "silence" in blog land, but it's just that time of the year where everything is racing to get done...! I just finished the last bit of domestic mailing. It will be a big miracle if those greeting cards go out in time. If not, everyone gets an extended Christmas...

        You are probably here to enjoy the next challenge. You'll like this one because we're all about Stripes this week! And stripes are super in this year - did you notice the clothing trend?


        Stripes actually made me think of candy cane. And I had this Banana Republic tag from my jeans sitting on my craft table for the longest time. I thought it had an interesting dimension, and was totally re-useable. I've also felt inspired and less scared to used Gesso. So in honor of my friend & inspiration Janna, who is a mixed media queen, I whipped out some left-over Gesso and decided to try a few things out of my comfort zone. Here is what the end product looks ;)

        Christmas Tag - Believe in Christmas
        Stamps: (Skating Circles) The Prairie Fairy; ('Twas the Night Before Christmas) Waltzingmouse Stamps
        Paper: (Banana Republic Jeans tag) Recycled
        Ink: (Jenni Bowlin Ink - No. 11 Brown Sugar; Tim Holtz Distress Inks - Vintage Photo) Ranger
        Embellishments: (Peppermint Collection - Border Stickers) Crate Paper; (Artists' Color Acrylic Series - Light Portrait Pink, Cadmium Red Hue) Utrecht


        It was really fun to get my fingers dirty. The background is inspired by candy cane and my need to break open the tube of pink acrylic paint that I had bought a few months back. To place the digi onto the tag, I used the trick we learned in our Nathalie Kahlbach workshop - transfer the print onto tissue paper, and brush Elmer's Glue or Glossy Accents onto the tissue paper.

        Christmas Tag - Believe in Christmas

        To make the edges of the tissue paper more antiqued, I brushed on some Vintage Photo distress ink for good measure ;) Anyways, head on over to the other DYSU girls and leave them some holiday love. They are getting all stripey for you....

        And our sponsors this week:

        The Prairie Fairy
        $15 Gift Certificate


        The Craft's Meow
        Winner's Choice of 1 Stamp Set

        Related Posts with Thumbnails